
Use Python, Anaconda, and PyCharm to set up a data science environment ready for local experimentation with the most popular Python libraries.
PyCharm and Anaconda Environments
In this post, I will explain and show how I use Python with Anaconda and PyCharm to set up a python data science environment ready for local experimentation with the most popular Python libraries for Machine Learning / Data Science.
This post is focused on Mac users, however, don’t panic, I will make short comments on how to achieve the same results on Windows. I myself use both so no preference there.
Requirements — You should be familiar with the following topics:
- Having a basic knowledge of bash commands or command line (depends on the operating system, Mac or Windows)
The following software will be installed.
The following Python libraries are of interest. I have provided a link for each library’s documentation if you are interested in reading more.
If you also want to use Jupyter Notebooks and even Jupyter Lab head over to my post: JupyterLab and Conda environment installation and setup.
Installing Anaconda
Anaconda can be downloaded from here.
Follow the installation instructions. There is nothing special about the installation, therefore, if you follow the on-screen installation instruction everything should be good.
Installing PyCharm
PyCharm can be downloaded from here.
I recommend installing the community edition of PyCharm, as it is free.
As for Anaconda installation, the same applies to Pycharm installation. Follow the on-screen instructions when installing the software, then everything should be good.
Using the Conda CLI to create an environment
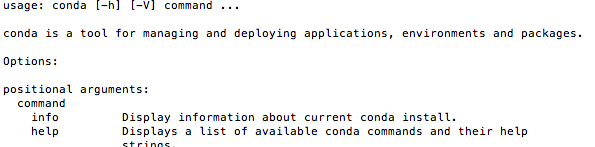
After installing Anaconda open a terminal window, type conda and press enter. If you see something similar to the below image then you have successfully installed Anaconda and the Conda CLI.
The default path to the Envs folder where all your created environments will be placed is /Users/<your user name>/anaconda/envs/.
I always cd to the envs folder before creating a new environment. So if you want to go ahead and cd into the envs folder. Execute the following command.
cd /Users/<your user name>/anaconda/envs/Remember this will only work if you have installed Anaconda in the default directory. Otherwise, navigate to your install location.
To create a new environment execute the following command.
conda create --name TestEnv python=3Before we can install any new python libraries into the new environment we need to activate the environment. To activate the created environment execute the following command.
conda activate TestEnvNext, we want to install four third-party Python libraries. In order to do that execute the following command.
conda install numpy pandas scikit-learn matplotlibThis should install the four libraries numpy, pandas, scikit-learn and matplotlib. In terms of getting started with learning Machine Learning, these four libraries should get you a long way.
When the libraries are installed you can check that everything is ok by starting a Python console. This is accomplished by executing the following.
pythonAfter the Python console is up and running execute the following and press enter for each of the four libraries.
>>>import numpy
>>>import pandas
>>>import sklearn
>>>import matplotlib
If the libraries are correctly installed you should not get any errors.
Creating a project in PyCharm
Now you have installed Anaconda and created an environment. Now we want to use PyCharm to create a project and execute Python code using the created environment. Here I assume you have installed PyCharm.
First, we want to create a folder that will be our project folder. You can create the folder anywhere you want on your machine. I use Dropbox a lot, therefore, all my local project folders are created in the path /Users/<your user name>/Dropbox/project_folders/.
Create a project folder, for example, named ProjectTestEnv.
Now open PyCharm click Open. When PyCharm is opened you should see something like the image below.
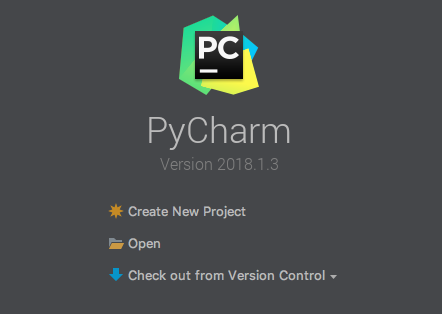
Browse to your recently created project folder and click open. PyCharm will now start a new project.
Setting up the interpreter for our project in PyCharm
Now each time we execute code from our Pycharm Project we want the code to use our newly created Conda environment, where we already have installed the libraries we want to use.
When PyCharm is done starting the new project navigate to “Pycharm” -> “Preferences”.

A new window will open. Select “Interpreter” and click on the icon in the upper right corner, then click “Add…”

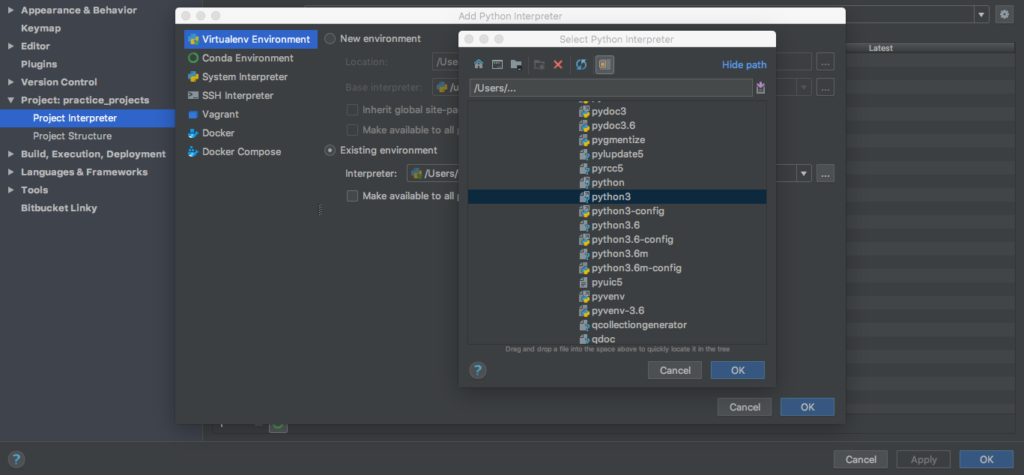
A new window will open. Here select “Virtual Environment” then click on “Existing environment” then click on the icon containing “…”. A new window will open. Here you have to navigate to the created environment for example /Users/<your user name>/anaconda/envs/TestEnv/bin/python3. Now press “OK” for all three open windows. PyCharm should now set the created environment as your project interpreter.
That’s all. Now you can use PyCharm to create python files in your project folder, just by right-clicking on the folder overview and adding new python files. You can then execute any python file in your project folder by right-clicking and on the file and selecting “Run ‘<your file name>'”
List of Conda commands I found the most useful
conda create --name <my environment name> python=>python version>This command consists of two parts. The first part conda create --name followed by the name you want to give your environment creates the conda environment. The next part python=3 specifies which version of python you want to be installed in the environment. By executing the conda create --name TestEnv python=2.7 conda CLI would create an environment called TestEnv with Python 2.7 installed.
source activate >my environment name>This command activates a specific environment. If we had created an environment called TestEnv we could activate that environment by executing the following command source activate TestEnv. This command is slightly different on Windows. On Windows, you will write activate TestEnv.
source deactivateThis command deactivates the environment. Again on Windows, it is slightly different. On Windows, you will write deactivate.
conda install <library name>After activating a created environment, you will probably need to install additional libraries, unless you can manage with core Python libraries, which are pre-installed. However, when you need to install and third-party library you will want to use the above Conda CLI command. For example, after activating the environment TestEnv you need to install the pandas library, this is accomplished by executing conda install pandas. This will install the newest available pandas library version.
conda update <library name>If you at some point need to update a library that you already have installed, you can accomplish that by using the above command. For example, you have installed the pandas library and after a while, you need to update the library to a newer version, this is accomplished by executing conda update pandas. This will update the pandas library to the newest version.
conda remove --name <my environment name> <library name>This command can be used when you want to remove an already installed library from an activated environment. For example, you have created the environment TestEnv and activated the environment, furthermore, you have installed the library pandas in the active environment. Now you need to remove the library pandas. This is done executing conda remove --name TestEnv pandas.
conda remove --name <my environment name> --allThis command can be used when you need to remove a created environment with its installed third-party libraries. For example after creating the environment TestEnv and installing the library pandas. In order to remove this environment with its installed libraries, you can execute conda remove --name TestEnv --all.
conda updateIf you need to update the whole Anaconda installation to the newest version you can execute the above command.
Interested in using Anaconda and Python for Machine Learning, then head over to my course Introduction to Machine Learning End-to-End. When you finish this course you will have a complete working code example, which you can use for other projects!

0 Comments
3 Pingbacks